The lowdown: Before you go and get a thermostat, there is a part that is very often broken along with your broken thermostat, it is the casing (the plastic thing that holds the thermostat in place).
Again, this is my W211, and the process itself is very simple as you will see below, loosen the cold air duct in front of the engine to make room for the screws to be removed, remove a couple of screws, install, then put them back, that is all there is to it.
When i came to change my thermostat, i unscrewed the 2 screws that hold the plastic casing in place at the front of the engine, and before you know it, it dropped, i thought there would be pulling, but no, the spacer that holds the thermostat in place, and is part of the casing/pipe was broken from the word go
Before you try to pull the spacer (Plastic cylinder) from inside, you need to remove the o ring which is likely trapped between the spacer and the engine (Near the surface), once the o ring is out, the plastic cylinder will come right out.
Once you do, your thermostat might be busted, but in my case, the rubber seal was not sitting right, probably due to the broken spacer, and created a space between the thermostat and the spacer, hence the problem
So, a good friend of mine bought a used but perfect condition M5, he is so happy about it, as a testament to how personal BMW cars can be, you can feel the adrenaline in his voice days before the handover date, and his happiness is contagious in a weird way, hence this page.
My 2014 Toyota Prius uses iridium-tipped spark plugs such as the Denso SK16R11 or the NGK IFR5A11, both usually set you back around $20, but if you buy them from the official toyota dealer, they will set you back $150 ! but I have no choice, as the market is flooded with counterfeit spark plugs, and changing the spark plugs on the prius requiers the removal of the wiper area !
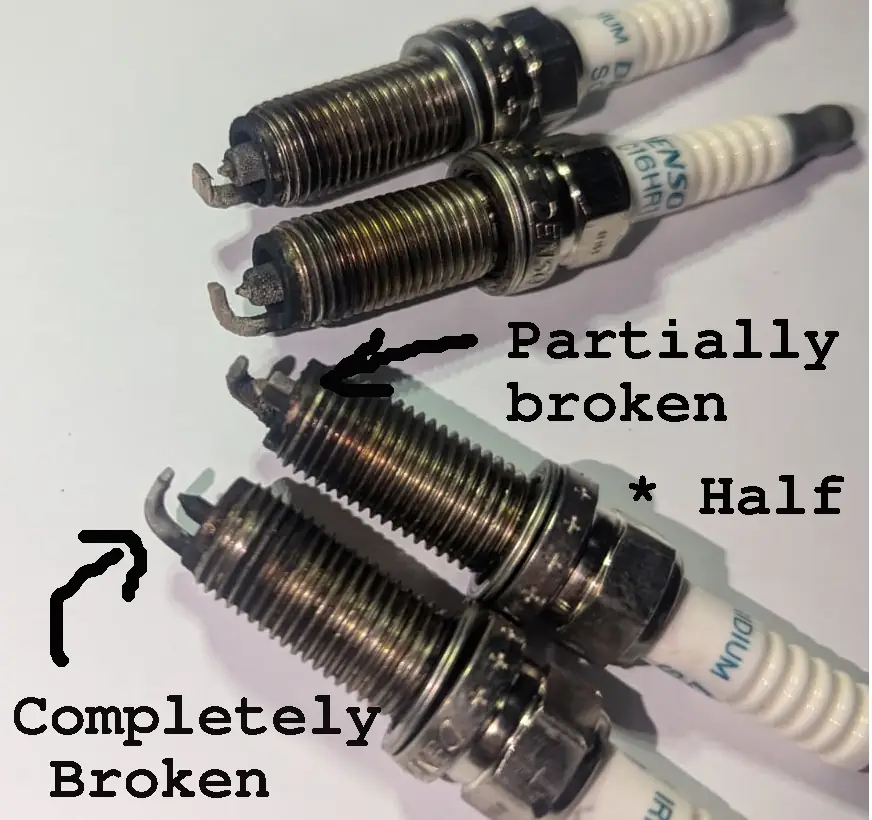
What about those $150 spark plugs (I will check the exact price and update this soon, so when I took them out after less than 5000 KMs and found two of them broken ! specifically the Insulator Nose (shield) around the copper core !
I had a failing head gasket, and the removal was part of fixing that, so I thought that the seeping oil or water into the piston might have been the problem, but since i maintained their order after removing them, It turns out that the one that has the inner shield fully broken was in a piston that did not suffer any head gasket leak !
Seems the Prius is known to blow head gaskets, reason being attributed to the hybrid system, the engine switches off and on so often, heating up and cooling down all the time.
I am using the official TIS repair manuals. I am warning you, this is a lengthy job, it is not something you can finish in a day.
Tools
There are plenty of tools that you will need along the way, everything from the tools needed to take out the EGR, to a triple square bit to remove the cylinder head bolts, in any case, here is a list of tools i recall needing
A ratchet, breaker bar, and a cheater bar
A torque wrench (I use ACDelco’s ARM302-4s)
Oil filter removal tool
10mm bi-hexagon wrench (An M12 (12mm triple square) bit will do if you fail to obtain the bi-hexagon ! but you will feel a bit of wiggle in it)
A pair of pliers
12mm socket (Many screws)
14mm socket (Many screws)
19mm socket (The harmonizer / crank pulley)
Feeler gauges down to 0.004 (0.004 is the maximum acceptable engine warp)
A super straight bar to assess the engine against (Laser cut)
Harmonic Damper removal tool such as Schley 64300 (I made my own simple tool that works)
A tool to take out the valve stem seals (I made my own)
Patience
The Harmonic Damper removal tool
There are many ways to remove the pulley (Harmonic Damper), 1- the most common of which is using a torque impact drill, it just works, but my gut feeling tells me it might not be wise, if it was, Toyota would have approved it, 2- another popular way is to use a belt or strap and tie it to a strong part of the vehicle and around the pulley to use friction to hold the pulley in place, problem with this method is that if it is not 100% horizontally aligned, and the pulley is being pulled in or out, it might cause damage, 3- and there is the Toyota way, which is based on using a tool to hold the pulley in place while you loosen the screw, examples of such a tool is the Schley Products 64300, I don’t have access to such a tool, so I improvised a tool that holds the pulley against the engine mount
Parts
Distilled water
7 Liters of distilled water, You are probably going to need to use distilled water before engine coolant to flush the engine from the contaminated coolant in the car, it was contaminated because your head gasket broke, and exhaust went through that coolant.
Engine Coolant
(Applies to both Fix and repair) If the coolant has been contaminated with engine exhaust, you will need to flush and add distilled water, then after a day (a day of light use, and zero days of the car sitting), remove as much of the water as you can and add the SLLC coolant (Do not run on distilled water for more than 1 day).
Totota’s coolant is super expensive, if you are looking for something other than the OEM, or want to understand the risks and advantages, check out my Toyota’s coolants post
The car takes 6.5 liters of coolant, every container is 2 liters !
Oil and oil filter
(Applies to both Fix and repair)
if the engine oil has been contaminated (And it has), you will need a new filter and new oils
Expected cost (35JD)
Gasket kit
PN: 04111-37316
The repair manual states that you will need a new gasket kit, the gasket kit has the following parts.
FIPG 103
PN: 00295-00103
The form in place gaskets from Toyota are best, but they are very pricey, I went with an aftermarket German brand (Victor Reinz Reinzosil) that is high quality (Used by German brands as OEM !) and have my fingers crossed, the Toyota FIPG costs around $50, the Victor Reinz Reinzosil (Universal) aftermarket brand costs less than 6 dollars
Cylinder head bolts
(90910‑02164 and later was superseded by 90910‑A2009)
Those are Torque to yield bolts, when you install them, they are stretched, and should not be used again, In my case unfortunately, Al markazeyah Toyota does not provide them, I was told today that they did have them at one point, and they cost $5 each (10 of them is $50), but they no longer carry them ! yes, I know, what the duck, as an exclusive dealer in Jordan, they absolutely should have them.
The Toyota repair manual often tells you to measure the bolts after removal, and replace them if they are out of spec — a classic sign of TTY design, even if not spelled out.
The process
Removing the spark plugs
Getting started with a big surprise !
I started by removing the spark plugs, like you normally would, and to my surprise, those brand new spark plugs (Less than 5000 KMs) are broken, and the ones that were broken are not even the ones where the head gasket leaked into ! Here is more about the failing spark plugs
The following is a result of me checking the right way to flush my engine of contaminated coolant in my 2014 prius, but it applies equally to modern Toyotas. my coolant was contaminated due to a blown head gasket !
The lowdown: fill it with distilled water, use it for a day in light traffic (Don’t let the water sit, you have to fill it and use it for a day, if the weather is hot, you should not stress it as water has less cooling capacity), then, flush as much as you can from those 6.5 liters of distilled watter, and once you have removed 5 or more liters, fill it up with SLLC (Not a drop of LLC is allowed)
The coolant from Toyota for modern cars (2004+) is super expensive ($21 for every 2L), my 2014 Prius for example has 10 liters of coolant in both engine and inverter loops, that would set me back around $100,
The coolant suitable for such new cars is called the SLLC (Super long life coolant), it comes premixed 50/50 (With distilled water)
Can i mix SLLC with the older LLC ?
You certainly can not ! they are chemically incompatible, You are not free to mix and match.
SLLC is compatible with both inverter and aluminum engine cooling systems, LLC is not, they have different chemical formulations and should not mix in any way. here is what is given by Toyota in the MSDS documents, obviously done by Toyota in a way to keep it ambiguous and keep others from copying the formulation
Long Life (LLC)
Super Long Life (SLLC)
Ethylene Glycol 107-21-1. 87% – 95%
Ethylene Glycol 107-21-1. 45% – 50%
Diethylene Glycol 111-46-6. Less than 5%
Hydrated inorganic acid, organic acid salts. Less than 5%
Hydrated inorganic acid, organic acid salts. Less than 5%
Water. Less than 5%
Water. Less than 45% – 50%
Bittering agent (Trace amounts)
NOTES:
NOTES: This is P-OAT chemistry. OAT = Organic Acid Technology “P-OAT” or “Phosphated OAT”
So what alternative coolants can be used ?
The coolant compatible with your aluminum engine is a P-OAT, which in Toyota terms is called the super long life, if you find the brands “AISIN or Zerex”, that is the OEM for the SLLC, as for the LLC the OEM is probably castle, As they have a product that comes in an identical container, but that is not definitive proof.
Things you DON’T need to know LLC *(The one you should not use on modern cars) is not premixed, you add 50% distilled water, but this is for older vehicles.
From other posts like this one, I seem to always be complaining about the 209 E200 W211, The thing i never mentioned is that I have an even older Mercedes E200, A W124 that has been parked for 8 years and decided just now to revive it.
for one, there is a water leak in the cooling system, for another, it has no gas in it, and the fuel pump is not working !
I recall from 8 years ago someone telling me “I can smell gas” While the car was parked near us ! So i am guessing, there is a small leak that is leaking out the gas
Not long before it got parked (8 years ago), the car had a serious leak (Leaked a full tank in a day) and I had to change the hose that connected the fuel tank to the fuel pump that is under the car !
Here are the specs, and this is post is all about how I plan to bring this car to life in a few days !
My Mercedes 200 E (W124 – E200)
Transmission: 5 Speed manual transmission
Engine: M111.940 (Wikipedia) (Check if part is 111 010 8700 on xentry/das)
It has that different looking steering wheel and shifter, If i recall right, this variant’s name has the word sport in it (probably sports line), but I am not sure what it was called exactly, I recall this info because I had to get the steering wheel shipped from Poland as no used or new parts dealer has ever seen it before
Diagnostics/OBD2
Well, this 1994 E does have a diagnostics port, but it is nothing like OBD2 (It is OBD1 not 2), it is very easy to read, just connect any LED (use a 12V LED, or adapt an LED for 12V with resistors obviously).
The 16 pin connector can be accessed with banana plugs connecting the LED to the flowing
The users manual does not go into sufficient detail concerning the (HFM Sequential Multiport Fuel Injection/Ignition System (HFM-SFI))
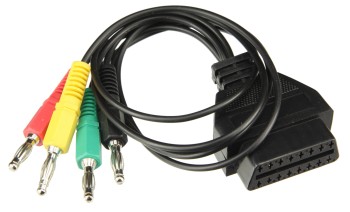
The OBD plug can be accessed with a scan tool (Ex: HfmScan) using the diagram below, if you insist on going into that rabbit hole, there are adapters (OBD2 to banana) like the one you see here, which connects the OBD connector to the following pins (OBD breakout cable 4 colours)
Now, I prefer using the LED method
Degrading wires (Mercedes and Porsche !)
Why I think claiming that the degrading wires were “intentionally installed for easier recycling” is a bullshit attempt to cover Mercedes benz’s unforgivable failure on those models
Having an arcing wire right next to the fuel pump is an even worse failure than the failing to predict that the wires will bio degrade
Giving a rust insurance of 30 years, and having the wires degrade after 10 ? doesn’t make any sense, You are implicitly telling the consumer you are expecting the car to live for 30 years, having its cables degrade starting after 10 years with the most dangerous ones, and eventually degrading to the extent that fixing it is not feasible contradicts the assumption of expected longevity !
Assuming the above is not correct in the sense that not all wires degrade, only those exposed to heat etc… defeats the purpose they claim the wires were scheduled to degrade for
To revisit
When your primary concern is getting it to run, you will come across stuff that needs attention after, here is a small list
The wires to the fuel pump need shrink wraps
Distilled water to be swapped with antifreeze
Shopping list
I don’t think this will be a long list, but I am mentioning what I needed here so that if you are in a similar situation, this might remind you of what you might need
Both kinds of polish compounds
Retouch paint, and application thingie
Thinner (To clean spray gun after)
Clear coat
Clean, lint free cotton
Masking paper
Electrician’s tape
Gasoline ! since it probably evaporated
A 12V tester (Usually in the form of a screw driver with a wire hanging out from the back to go to ground/Negative)
A 12V car battery (The one in the car is 100% toast)
Distilled water for the radiator (Add antifreeze later)
Head gasket and valve stem seals !
Surprise ! the head gasket is toast (happened while it was sitting) ! So I will probably need to start with this one
The head gasket i found on the market are Reinz (Victor Reinz now owned by DANA)… Part number 61-29105-10 – I am told that for that model year, the gasket was either Reinz, or Elring, Mercedes used both as OEM so I am hoping i should be good… the head gaskets for the M111 was a multi-layer steel (MLS), and is 91 mm diameter, 1.75 mm thickness, which is what the gasket i have is !
On ebay, it says this gasket fits the OEM numbers (111 016 05 20, 111 016 06 20, 111 016 11 20, 111 016 26 20, and 111 016 27 20)
For the Exhaust Manifold Gasket, I found the Victor Reinz Exhaust Manifold Gasket 71-29349-00, which seems to fit the bill (matches Mercedes-Benz OEM numbers 111 142 05 80 and 111 142 08 80) Torque spec for the M111 exhaust manifold nuts is 25 Nm (Double check)
TTY head bolts: So, what is left is finding new TTY head bolts (torque-to-yield), this is usually where my problems begin, I am always forced to use the old bolts (Like everyone else) because finding those bolts is next to impossible in Jordan ! they tell me (We don’t cary them because no one orders them), this happened to me lately with my Toyota and almarkazeyah exclusive Toyota dealer !
Valve stem seals: Found the Corteco brand (PN: 19034069) ! this is not ideal as I prefer having OEM like Reinz or Elring, But I am being told Cortico is a brand of Freudenberg, the inventors of the seals you see on the crank of your car for example (Their brand of it was called Simmerring), So, with this old engine, I guess i will give them a go ! the box I have reads (made in Italy), Italy is the place where Chinese products go to get a European seal of origin (A loophole in the system, probably intentional) states that if anything is added to the product in italy, it can be branded as made in Italy !
The list of questions and information will probably continue to grow until i end up buying a new electric car, so i will keep updating this list as i find out more about this car.
I am thinking of getting the Toyota BZ4X, So I will be posting my findings here, the order of the questions is counter intuitive, because I always prefer to start at the place that branches most
– Is the Toyota BZ4x exactly the same as the Subaru Solterra ?
All the research up to now says they are identical, but i have not been able to validate this conclusion yet
– Which diagnostics software does the car use ?
Why so early with this question ? because the upcoming questions need to adapt to answer this one which provides better questions down the line !
On the Toyota Techstream website, there is a claim that Version 18 works with the BZ4X, I will test this in person hopefully today.
– The BZ4X sold in china is made by GAC MOTOR (FAW no longer makes them), while the one sold in north america is made in Japan, are those cars exactly the same ?
My research up to this point says they should be, but I can’t seem to find any differences besides the battery size
– Cars sharing the e-TNGA platform share what exactly ?
Electric motor location, driver positioning, and battery width are fixed between all the models that will use this platform (Toyota, Subaru, Suzuki, Daihatsu, and possibly mazda)! Number of batteries, Wheelbase, and anything not mentioned in the fixed list can probably be different
– Maintenance and possible pitfalls
To begin with, I still drive a Nissan Leaf 2014, with over 100K Kilometers on it, and 10 bars of battery health, the car has paid for itself over the past few years (Before the most recent electricity hike in Jordan)
So, because one point leads to the other, going through the 3 points above in the counter intuitive direction (In reverse) makes more sense
The mnost common OBD2 adapter used with Toyota techstream is a $20 clone of the XHORSE brand adapter
This adapter is slow to say the least, So i will be comparing it to the Godiag adapter in terms of speed and functionality since they both can work on techstream, and they are priced almost the same.
In linux, the adapter has the IDs (0403:6001), which is naturally the UART side of the adapter, the complete lsusb line is
Bus 003 Device 003: ID 0403:6001 Future Technology Devices International, Ltd FT232 Serial (UART) IC
To pass this to virtual machines, a file needs to be made , so create the file ““/etc/libvirt/qemu/usb/xhorseclone.xml”
My $25 GoDiag GD101 Nano showed up in the mail yesterday, Acording to the seller, it has functionality similar to Tactrix Openport 2.0, but we are yet to test this theory
Planning to test the tool with a bunch of software and post results here
Since the tool makes no claim about being compatible with Mercedes xentry passthrough, I will be starting there (Verified, Works well with Xentry/DAS, Speed is not bad, no special setup required besides installing the driver)
as soon as I plug in the godiag USB, windows 10 Added USB Serial Device (COM 3) at 9600bps, 8 data bits, and 1 stop bit, while Linux (lsusb) returned “Bus 003 Device 005: ID e327:2534 NATIONS N32G43x Port”, again, this is probably just the UART adapter, and has nothing to do with what to expect in terms of functionality
To begin with, I will be installing everything in a KVM machine, and passing the godiag device to it with the following file “/etc/libvirt/qemu/usb/godiag.xml”
First, If you are here to research before you buy, the post explaining everything not specific, but applies to VW is here.
VW- group cars include Volkswagen, Audi, Seat, Skoda, Bentley, MAN, Lamborghini, and Bugatti, all those vehicles use the same VW diagnostics software.
The software for VW cars is called ODIS and comes in 2 flavors, Service and Engineering (ODIS-S, and ODIS-E)
You don’t need all of the hardware to run the ODIS system as any windows based machine should replace most parts of the station, What you will need is a VCI pass-thru device.
In fact, you don’t need the original hardware at all for that purpose, Your laptop and a cheap passthrough device should do, for example, the GODIAG GD101 is a $20 passthrough piece that works with VWs own software
Legend: Red = Complete system Green = VCI passthrough plug
VAS5052A (Computer)
VAS5054 (VAS5052A) (VCI, OKI Chip, Bluetooth)
VAS5054A (VAS5052A) (VCI, OKI Chip, Bluetooth)
VAS6150B
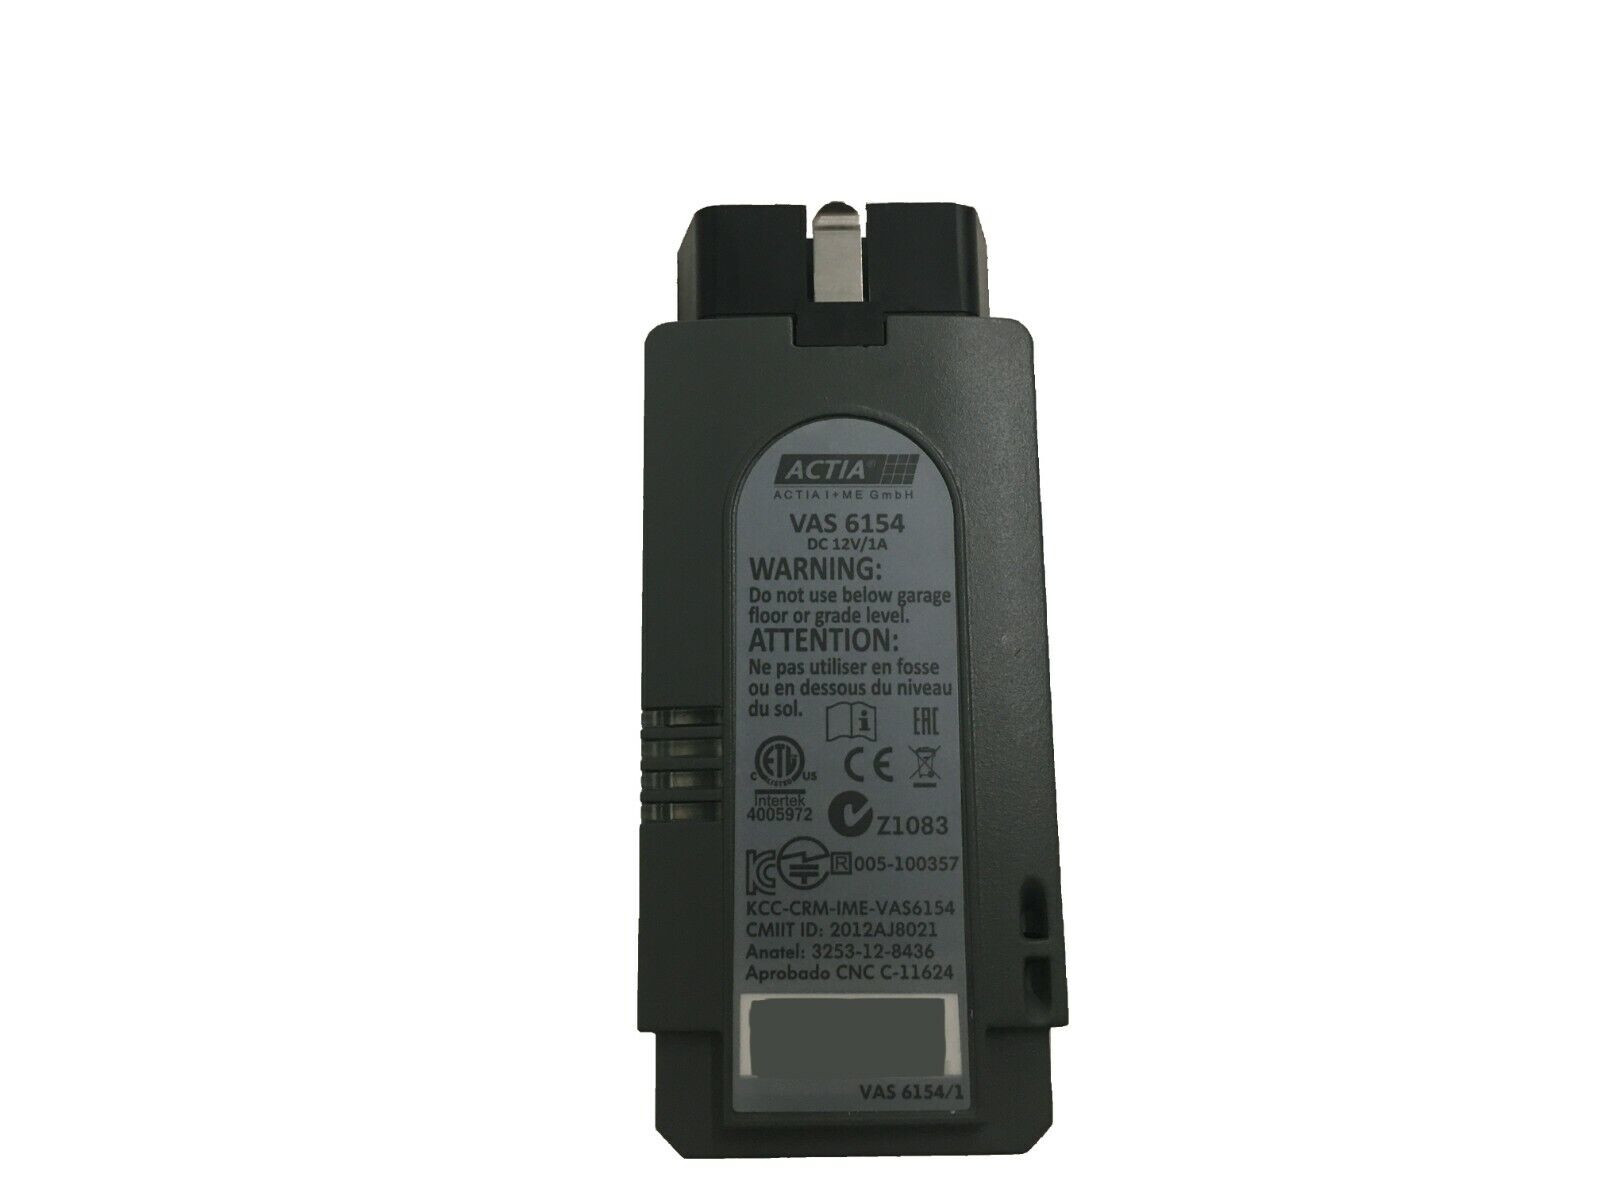
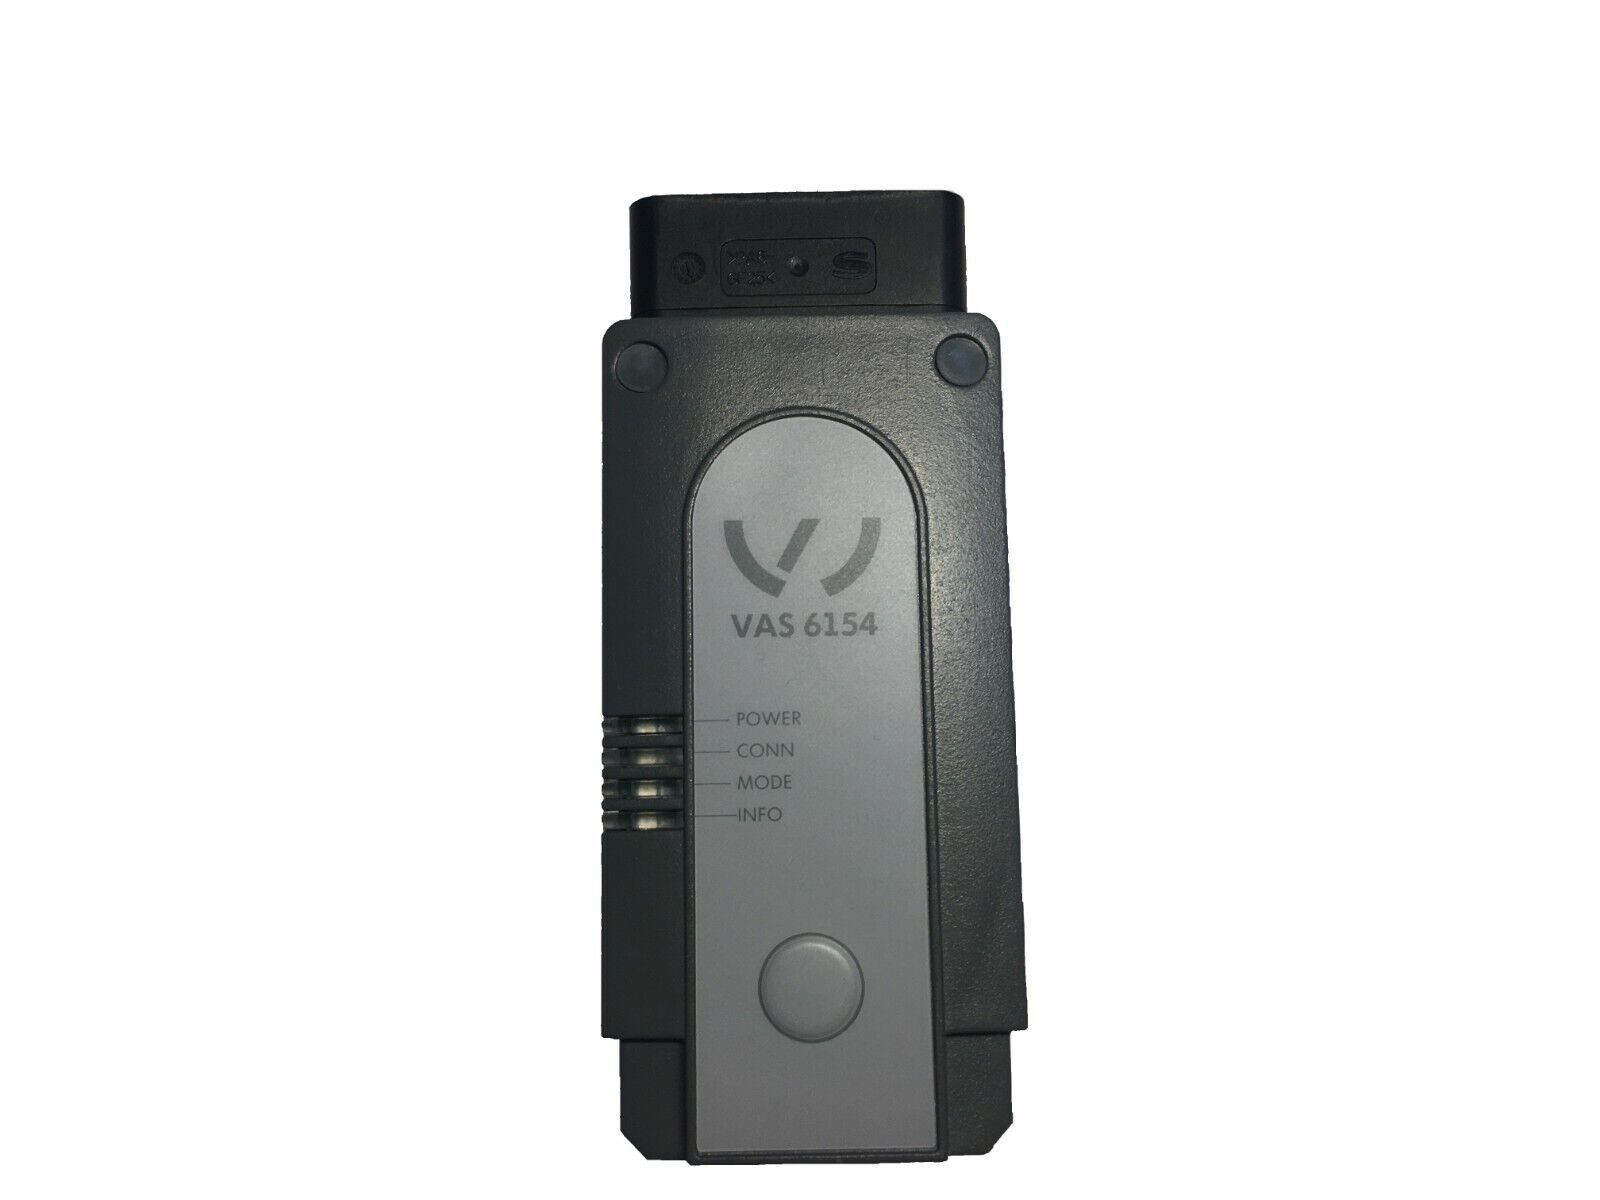
VAS 6154A (Like B but different wifi chip)
VAS 6154B (VCI, ODIS-S 23.0.0 and newer only)
VAS6160A (VAS 6160 (Newer vehicles), VAS 5051 (Older vehicles), VAS 5052 (non-brand vehicles), VAS 5052A)
VAS6160C
VAS6150E-NV
VAS6150F (VAS6154B)
VAS6150F-NV
Processed By eBay with ImageMagick, z1.1.0. ||B2Processed By eBay with ImageMagick, z1.1.0. ||B2
We use cookies to ensure that we give you the best experience on our website. If you continue to use this site we will assume that you are happy with it.